Proxmox VE GPU Passthrough Report
Some notes and references on the GPU passthrough settings.
The guide is a sufficient condition for GPU passthrough, not a necessary one. Keep in mind that the passthrough settings highly depend on your Proxmox version and hardware. This note is only expected to work on Proxmox VE 7.3 combined with the exact hardware. For other Proxmox versions or hardwares, please refer to the potential references instead.
Hardware Spec
Motherboard: ASUS TUF GAMING B550M-PLUS (WI-FI)
CPU: AMD Ryzen 3 3100 4-Core Processor
GPU: NVIDIA GeForce GTX 1650 SUPER
The GPU is plugged into the primary (top) PCIe slot.
A external monitor is connected to the GPU through HDMI.
Installing Proxmox VE
You can skip this section is you already installed Proxmox VE on your machine.
Follow the official documentation to install Proxmox VE.
Specifically, follow the steps below:
Download the ISO file here.
In my case I downloaded Proxmox VE 7.3: proxmox-ve_7.3-1.iso.
Burn it to a USB stick with Rufus or dd.
Configure BIOS to boot from USB to start the installation process.
You will need to enter:
- Proxmox Host Password & Your Email
- Hostname (FQDN) such as
pve.local - IP Address (CIDR) such as
192.168.0.100/24 - Gateway such as
192.168.0.1 - DNS Server such as
192.168.0.1
You can connect through SSH:
ssh root@192.168.0.100
# or optionally with port tunneling:
ssh root@192.168.0.100 -L 8006:127.0.0.1:8006
# or optionally with SPICE support
ssh root@192.168.0.100 -L 8006:127.0.0.1:8006 -L 3128:127.0.0.1:3128
and connect to the GUI through HTTPS (accept unsigned certificate and with username root), not HTTP. Example:
https://192.168.0.100:8006
# or with port tunneling:
https://127.0.0.1:8006
Download Ubuntu ISO through GUI:
Datacenter > pve > local (pve) > ISO Images > Download from URL
Take Ubuntu 22.04 as an example:
URL: https://releases.ubuntu.com/jammy/ubuntu-22.04.2-desktop-amd64.iso
File name: ubuntu-22.04.2-desktop-amd64.iso
Click Create VM:
- General
Default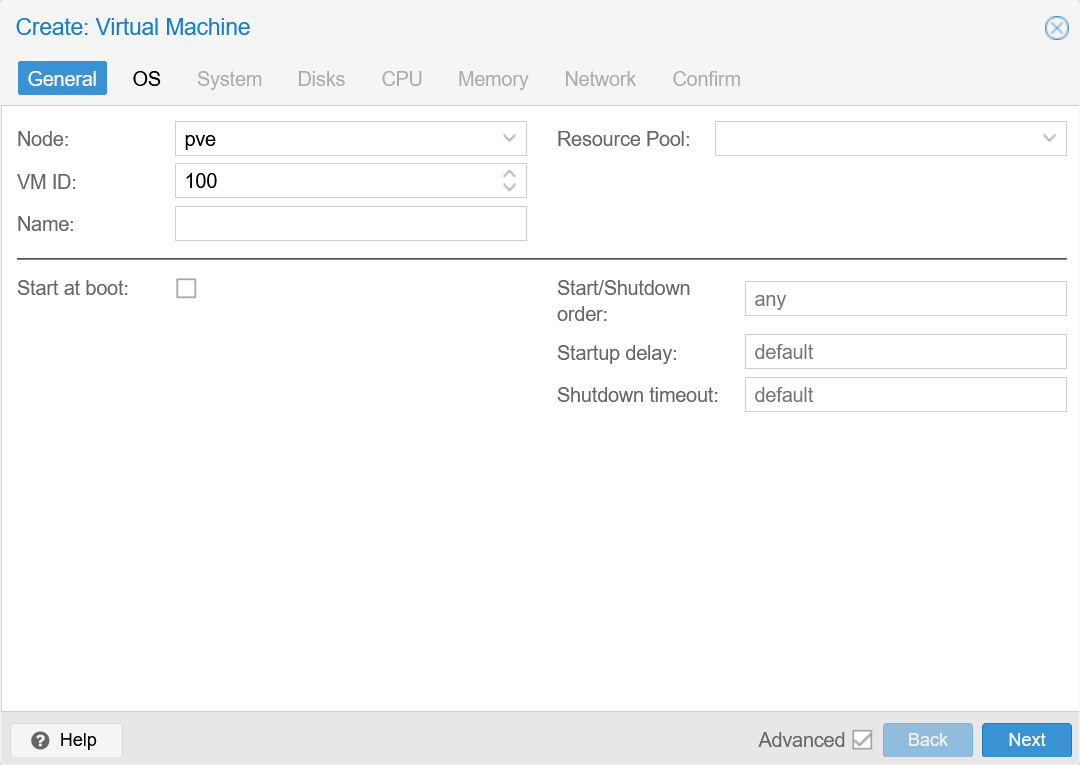
- OS
Select Ubuntu 22.04 ISO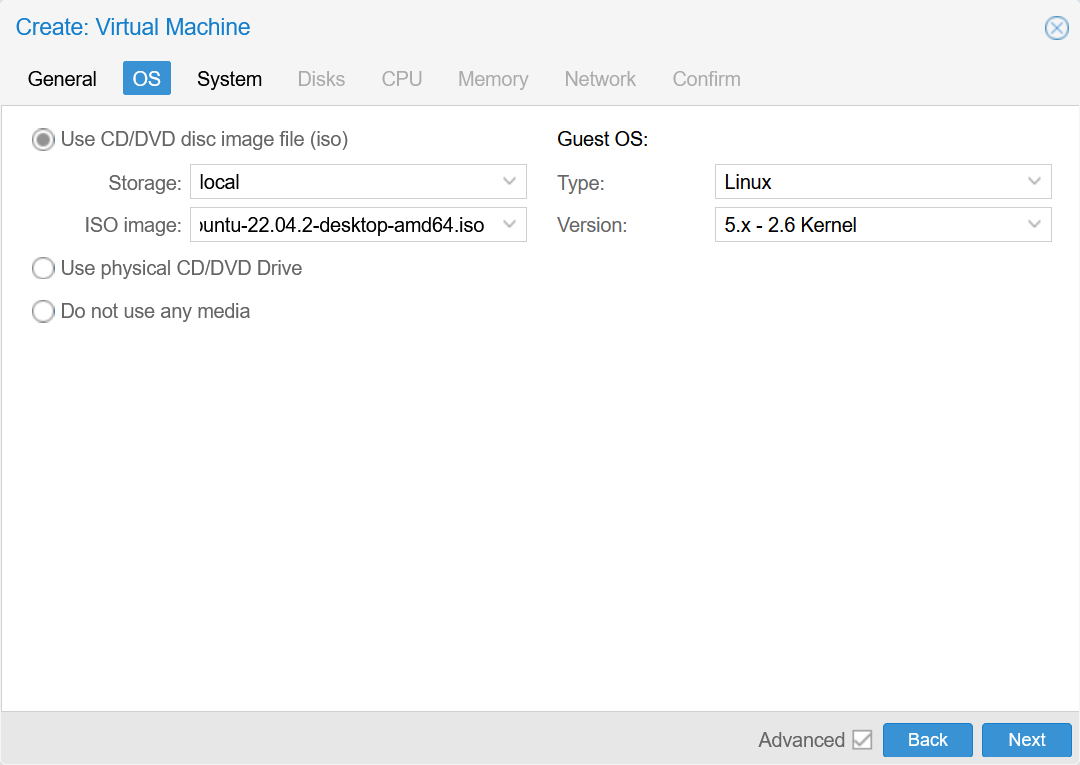
- System
Default or
or q35+OVMF (UEFI)withEFI Disk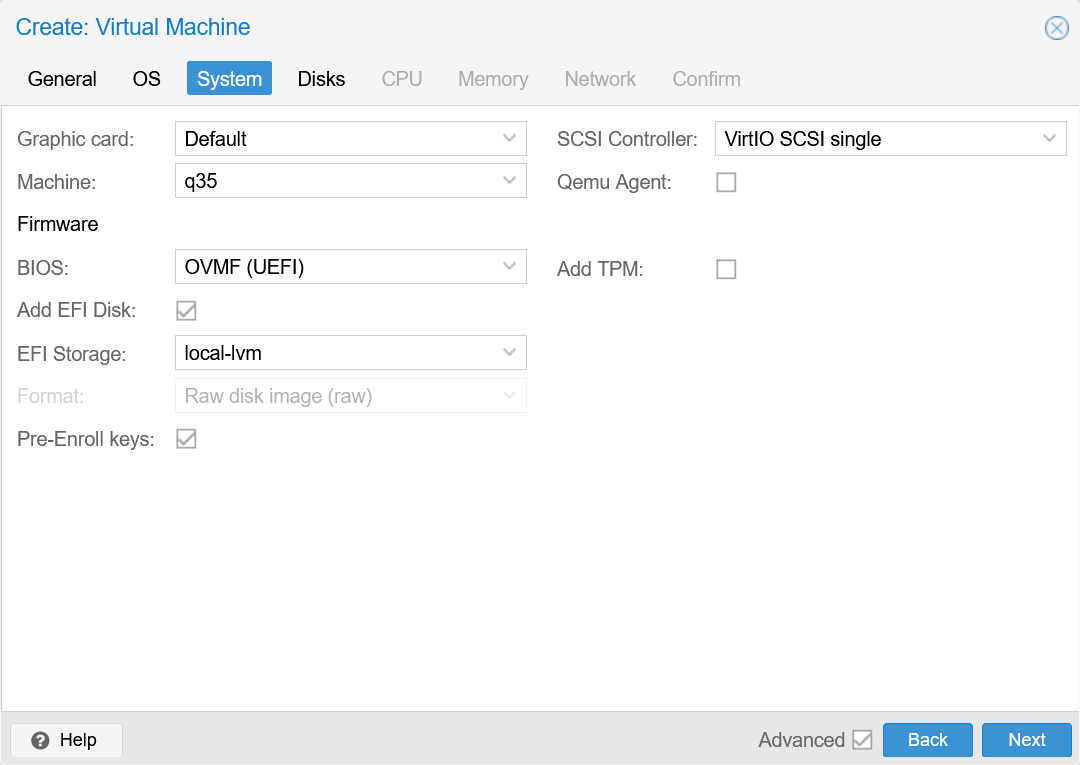
- Disks
Default; Optionally selectSSD emulationif you are using a SSD instead of a HDD.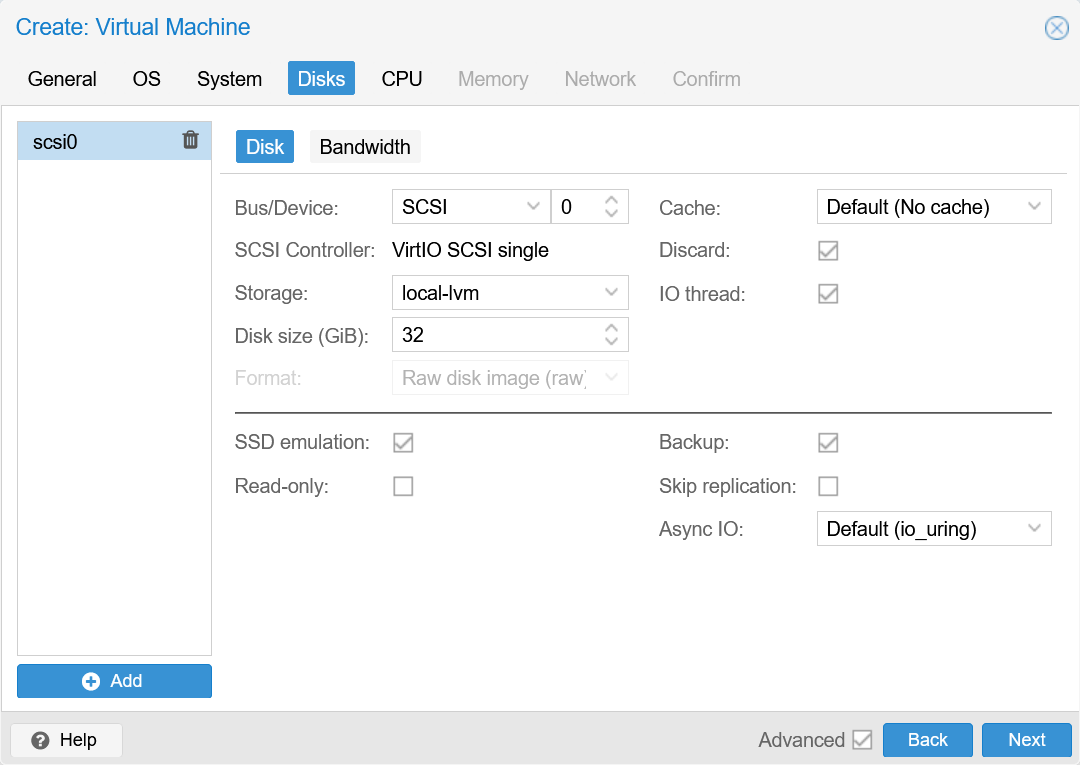
- CPU
Increase Cores; CPU Type can be changed tohost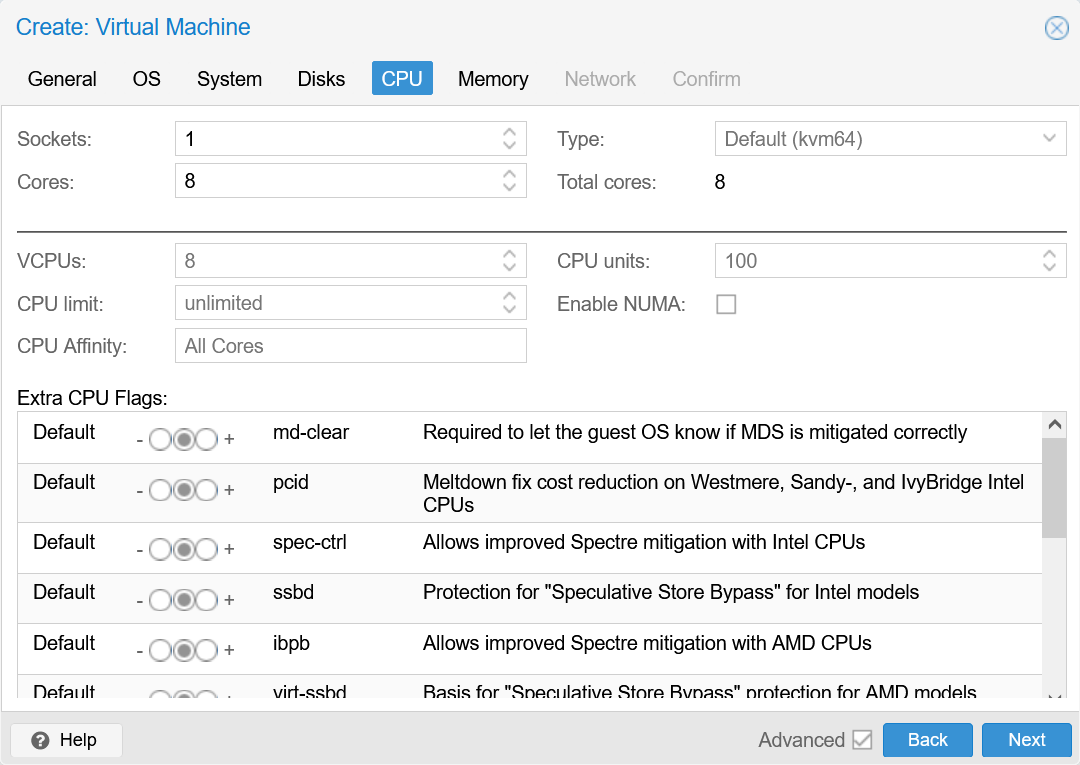
- Memory
Increase Memory; Optionally disableBallooning Device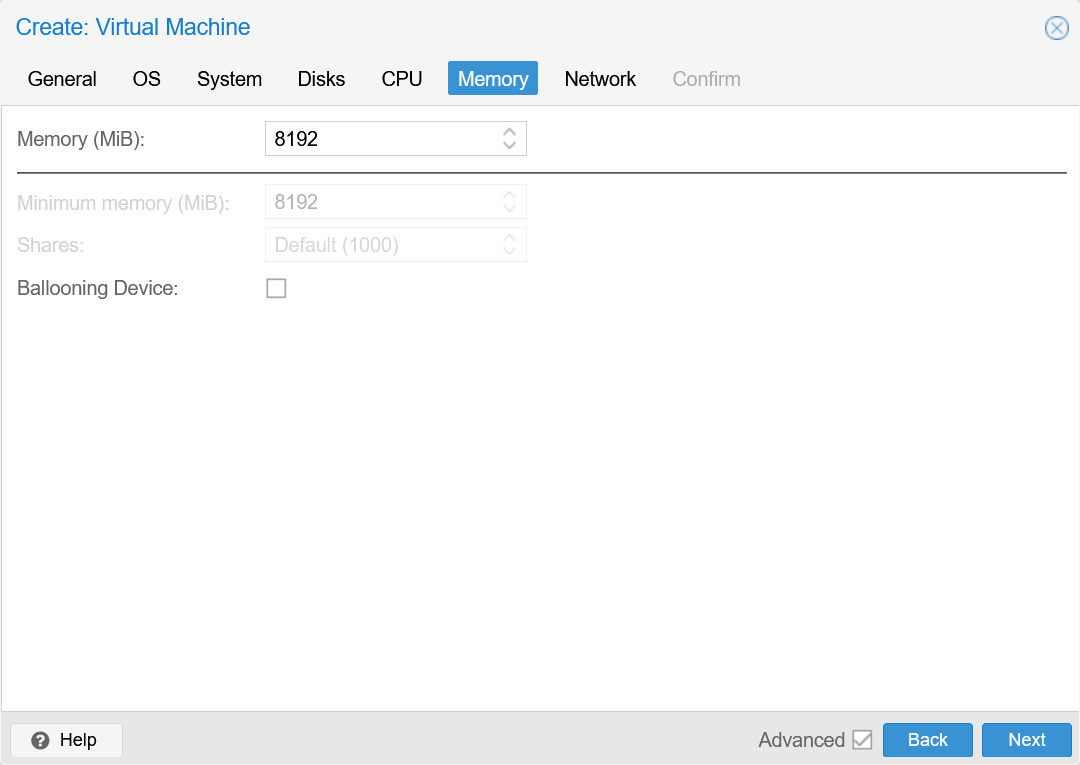
- Network
Default
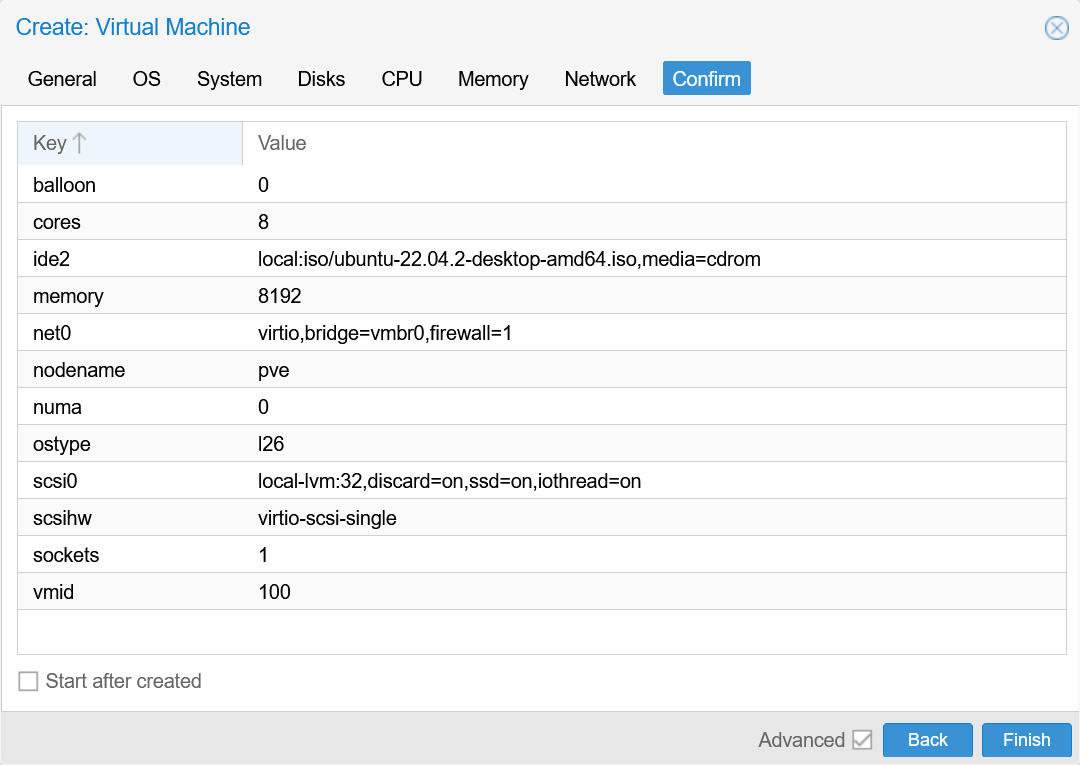
- Confirm
Add GPU as PCI(e) device:
Hardware > Add > PCI Device
Select GeForce GTX 1650 SUPER:
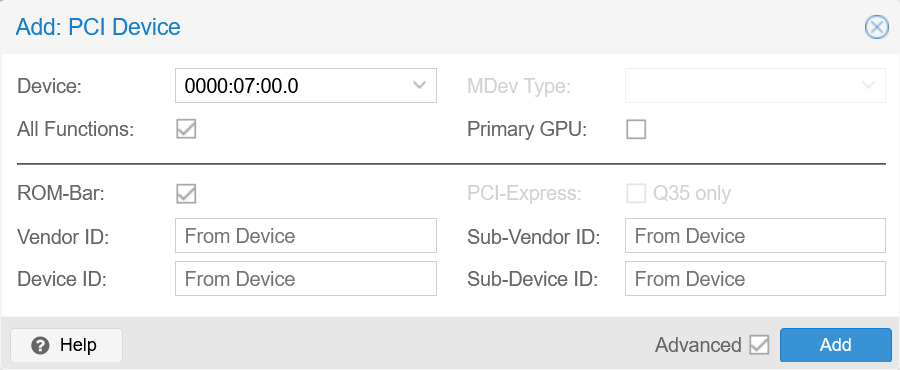
For q35, you don’t need to check PCI-Express. I’m not quite sure if checking it will cause issues…
In my vague memory, checking Primary GPU seems to work, but may require changing the Hardware > Display to Virt-IO GPU. I’m not sure about this though.
Final Configuration:
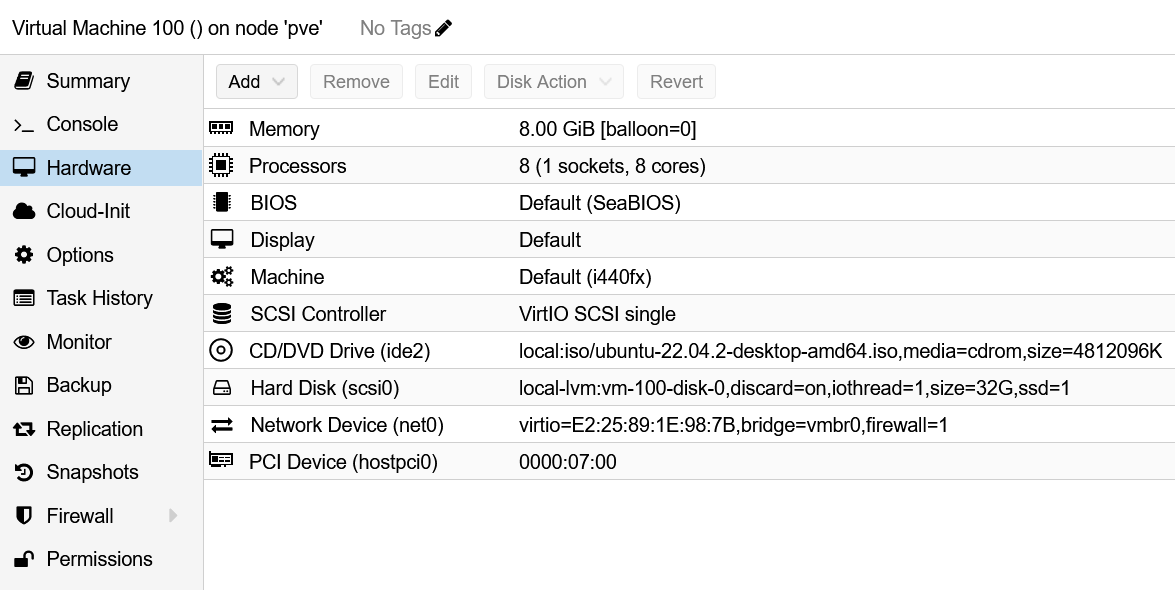
Take a snapshot and name it as Init.
Start the VM with Console and go through normal Ubuntu installation.
After Reboot, power off the VM and take a snapshot with name Fresh_Install.
Note that you can right-click and
Quitthe initial Ubuntu popup.– Johnson
You can now set the CD/DVD Drive to Do not use any media.
If anything go wrong in the future steps, revert to the previous snapshot. You may also want to run sudo apt install -y openssh-server and connect to the VM through SSH if your Console VNC stuck at some point during boot.
GPU Passthrough
-
Configure Host BIOS (Press
deleteduring boot):Make sure virtualization technologies are enabled. The instructions for this motherboard can be found here.
-
Configure GRUB on Proxmox Host (Terminal/SSH)
Edit
/etc/default/gruband change the following line:GRUB_CMDLINE_LINUX_DEFAULT="quiet"to:
GRUB_CMDLINE_LINUX_DEFAULT="quiet amd_iommu=on iommu=pt initcall_blacklist=sysfb_init"(without new line)
Save and close the file and execute
update-grub.Explanations:
-
Configure Modules on Proxmox Host (Terminal/SSH)
Edit
/etc/modulesand add the following lines:vfio vfio_iommu_type1 vfio_pci vfio_virqfdSave and close the file.
Reboot the host.
Explanations:
The VFIO driver is an IOMMU/device agnostic framework for exposing direct device access to userspace, in a secure, IOMMU protected environment.
-
Create VM on Proxmox Host (Web GUI)
In our setting, we don’t need to deal with interrupts, roms, etc.
Verify GPU Functions
-
PCI(e) Passthrough
sudo lspci -vExample Output:
00:10.0 VGA compatible controller: NVIDIA Corporation TU116 [GeForce GTX 1650 SUPER] (rev a1) (prog-if 00 [VGA controller]) Subsystem: ASUSTeK Computer Inc. TU116 [GeForce GTX 1650 SUPER] Physical Slot: 16 Flags: bus master, fast devsel, latency 0, IRQ 40 Memory at fd000000 (32-bit, non-prefetchable) [size=16M] Memory at e0000000 (64-bit, prefetchable) [size=256M] Memory at f0000000 (64-bit, prefetchable) [size=32M] I/O ports at f000 [size=128] Expansion ROM at 000c0000 [disabled] [size=128K] Capabilities: [60] Power Management version 3 Capabilities: [68] MSI: Enable+ Count=1/1 Maskable- 64bit+ Capabilities: [78] Express Legacy Endpoint, MSI 00 Kernel driver in use: nouveau Kernel modules: nvidiafb, nouveau -
Ubuntu Drivers Devices
ubuntu-drivers devicesExample Output:
== /sys/devices/pci0000:00/0000:00:10.0 == modalias : pci:v000010DEd00002187sv00001043sd00008769bc03sc00i00 vendor : NVIDIA Corporation model : TU116 [GeForce GTX 1650 SUPER] driver : nvidia-driver-470 - distro non-free driver : nvidia-driver-525 - distro non-free driver : nvidia-driver-510 - distro non-free driver : nvidia-driver-525-server - distro non-free driver : nvidia-driver-470-server - distro non-free driver : nvidia-driver-450-server - distro non-free driver : nvidia-driver-525-open - distro non-free recommended driver : nvidia-driver-515-open - distro non-free driver : nvidia-driver-515 - distro non-free driver : nvidia-driver-515-server - distro non-free driver : xserver-xorg-video-nouveau - distro free builtin -
NVIDIA Driver
sudo apt install -y nvidia-driver-525
reboot
nvidia-smi
The output should be normal
nvidia-smioutput. If you runlspcinow, you will find that the driver & modules have been updated:Kernel driver in use: nvidia Kernel modules: nvidiafb, nouveau, nvidia_drm, nvidiaPower off the VM and create snapshot:
Setup_NV_Driver.If you observed the following error, you may forget to reboot:
NVIDIA-SMI has failed because it couldn't communicate with the NVIDIA driver. Make sure that the latest NVIDIA driver is installed and running. -
NVIDIA CUDA
sudo apt install -y nvidia-cuda-toolkitThis command may uninstall the previously installed driver, causing
nvidia-smito be removed.You can attempt to reinstall the driver and do not press
Y:sudo apt install nvidia-driver-525and observe which packages will be removed, in our case:
The following packages will be REMOVED:
  libnvidia-compute-495 libnvidia-compute-510 libnvidia-ml-dev nvidia-cuda-dev nvidia-cuda-toolkit
So we know we need to install:
sudo apt install -y nvidia-driver-510and reboot.
nvidia-smishould work after the reboot.You can skip all this hassle if you know how to run CUDA inside NVIDIA Docker, but this is out of the scope of this note.
– Johnson
Edit
~/hello.cuand paste the code from The real “Hello World!” for CUDA.Compile and run:
cd ~
nvcc ./hello.cu
./a.out
It should output:
Hello World!We are now all done, power off the VM and create snapshot
Setup_CUDA.
Side Notes for Proxmox VE
apt update Proxmox repository is not signed
Full error message:
E: Failed to fetch https://enterprise.proxmox.com/debian/pve/dists/bullseye/InRelease  401  Unauthorized [IP: 51.79.159.216 443]
E: The repository 'https://enterprise.proxmox.com/debian/pve bullseye InRelease' is not signed.
Solution:
Go to Datacenter > $NODE_NAME > Updates > Repositories and disable pve-enterprise.list.
Then add a new repository by selecting No-Subscription.
Other References:
- Install Proxmox VE on Debian 11 Bullseye
- The repository ‘https://enterprise.proxmox.com/debian/pve bullseye InRelease’ is not signed
Adding a new HDD
Go to Datacenter > $NODE_NAME > Disks, select the new disk and click Wipe Disk.
You can now use the disk in one of the following: LVM, LVM-Thin, Directory, ZFS.
Audio Support
In the Hardware tab, change Display to SPICE (qxl) and add an Audio device.
Download the SPICE connection file in the Console tab by Console > SPICE. Open the file with virt-manager.
Sidenote: SPICE also supports Clipboard sharing.
Other References:
/dev/mapper/pve-root 100% Full on Host
It may be due to large log files in /var/log/. You may delete them to save space.
Disk Discard
Discard is use to free space on your physical storage, you delete a file inside a guest vm for example. without discard, when you delete a file, the space is still used on the the physical storage, so you can’t use it in another vm.
Memory Ballooning
Ballooning affects performance so we disable it. It allows for the ram to grow as needed but we don’t want that for stability and performance reasons.
– Proxmox 7.3 GPU Hardware Acceleration for Jellyfin/Plex/Emby
pci_hp_register failed with error -16 During VM Boot
In my environment, ACPI causes this problem, just turn it off in OPTIONS and the problem goes away.
Secure Boot
In my case, the iso is not signed, and can’t be started using SecureBoot (which is the default on the latest OVMF shipped with Proxmox). If you hit the escape key while it says ‘Startup boot options’ (and before it says the UEFI message about saying hitting escape that doesn’t actually work), then you get into the UEFI menu which you can use to disable Secure Boot and then boot the iso
Hit escape when you see the Proxmox logo on boot. Then Device Manager -> Secure Boot Configuration Make sure Attempt Secure Boot is disabled. If not, disable it and restart system.
Side Notes for GPU Passthrough
Debugging Commands
lspci -v
lsmod | grep nvidia
sudo dmesg | grep nvidia
cat /var/log/syslog | grep nvidia
nvidia-smi
No Output: dmesg | grep -i dmar
On Ryzen systems, there is no output from
grep -i dmar. This is normal.
lspci -v Shows !!! Unknown header type 7f For VM GPU
In the Hardware settings, try uncheck the PCI-Express box.
SeaBIOS Instead of OVMF (UEFI)
I believe using the VMs with a UEFI BIOS may have been the issue or at least contributed to it. I don’t have much time to look into this at the moment, but can look again if you still have issues.
So I’ve created VM with:
- BIOS: Default (SeaBIOS)
- Machine: Default (i440fx) And it just worked!
CUDA-Compiled Excutables Freeze On Launch
lspci -v and nvidia-smi all work correctly in this case. This issue also seem to make the VM BIOS very slow and unresponsive (unverified).
Any CUDA-compiled executable should work, but you can try out The real “Hello World!” for CUDA.
This issue may arise from the PCI(e) pass through due to a breaking change introduced in Proxmox VE 7.2.
add
initcall_blacklist=sysfb_initto the kernel parameters on the Proxmox host. No need to reset the GPU via scripts but do early bind it to vfio-pci.
By the way, I also found better solution on a reddit post. It is adding “
initcall_blacklist=sysfb_init” to kernel parameter. No need “video=efifb:off” or “video=simplefb:off” in kernel parameter.
edit your grub, and just add:
initcall_blacklist=sysfb_init
Finally got my gtx1070 passed through
initcall_blacklist=sysfb_init
Host BIOS Settings
Potentially you can try out the followings:
Advanced\AMD CBS\IOMMU: Enabled
Boot\CSM (Compatibility Support Module)\Launch CSM: Disabled
Boot\Boot Configuration\Fast Boot: Disabled
and enable other Virtualization Technologies such as Intel VT-x, Intel VT-d, AMD-V, AMD-d.
Other Potential References
Comments are configured with provider: disqus, but are disabled in non-production environments.